This page provides practical instructions for creating drivelines. For more details and a more complex explanation, as well as discussion of not-yet-implemented features, see the Talk:Theoretical Driveline Model page.
Drivelines are used to show SuperTuxKart where the track is. Drivelines are represented in Blender by a series of connected quads, with the beginning marked by a special structure. However, they are not visible while playing unless this is enabled via Artist Debug Mode.
Contents
- Creating the main driveline
- Creating secondary drivelines
- Checklines
- Additional Lap Lines
- Conclusion
Creating the main driveline
Note: Both of methods listed recommend removing faces from the driveline. This is not actually necessary, but makes a track easier to view.
If you followed the previous module
You will have a flat track made of quads already. You can simply duplicate this track, switch into edit mode, select all points with the “a” keyboard shortcut, tap the Delete key and delete Only Faces. Then follow the instructions below for creating a start line.
If you made a track another way
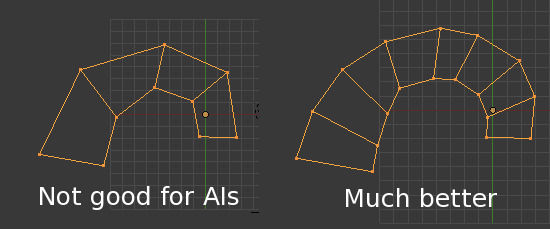
Start with a quad plane, and delete only its face (preserving the vertices and edges). Then, attach points until you have a series of quads, each connected to its adjacent ones, all along your track in a loop. Make sure that the driveline turns smoothly around corners; otherwise the AI karts could have trouble driving.
Creating the start line
The start line of a track in SuperTuxKart is denoted by a gap between two disconnected quads, and “antennae” lines from the endpoints of the quad which will be the start line. A picture does a better job of explaining this:
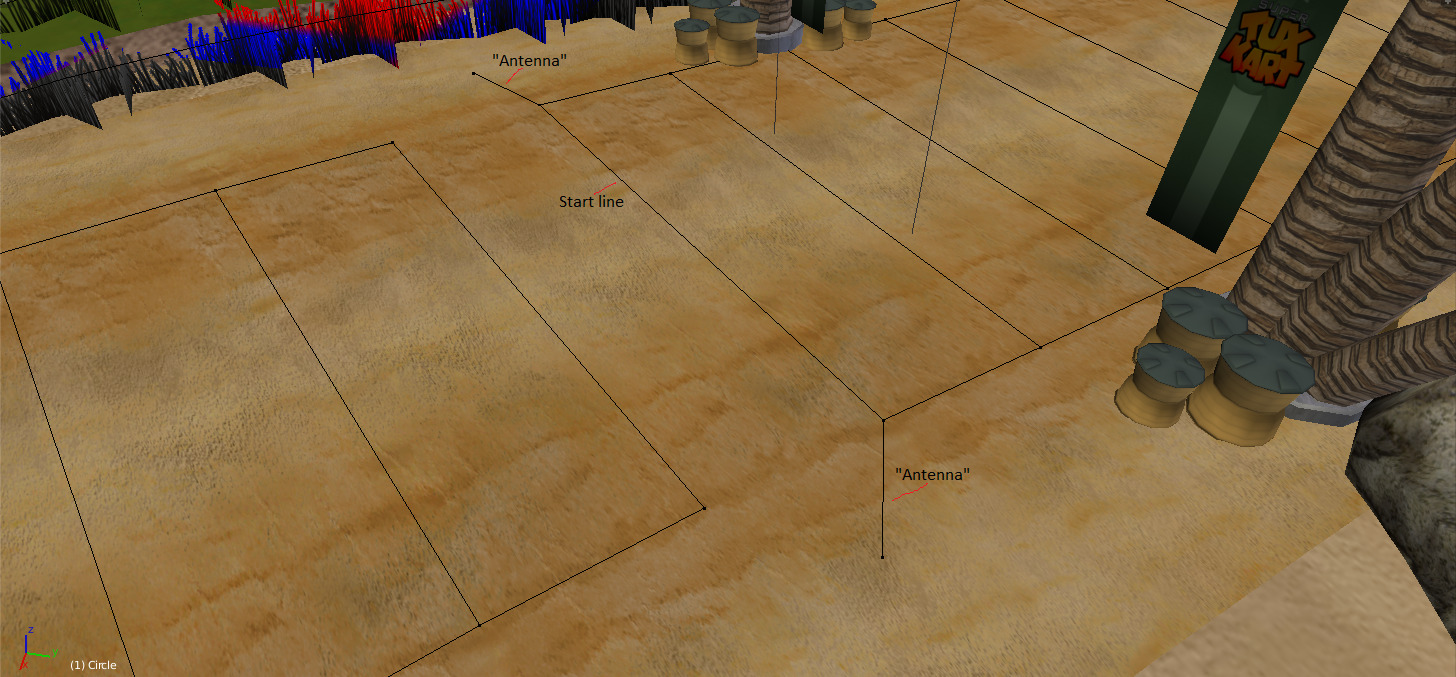
Make the driveline active
To make the exporter recognize the driveline, under Object Properties for the driveline object, under SuperTuxKart Properties, set “Type” to “Driveline (main)”. Ignore the “Activate” property for now.
Creating secondary drivelines
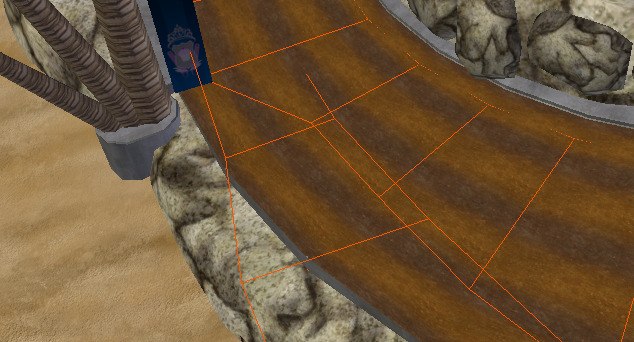
Although each track can only have one main driveline, you can use secondary drivelines for shortcuts or alternate routes. They have the same structure as a main driveline, but rather than making the driveline cyclic, place the antennae near two points of a quad of the main driveline where you want the AI karts to deviate from the main track and place the end of the last quad where you want the alternate route to rejoin the main one. Then set the type to “Driveline (additional)” in the SuperTuxKart object properties panel. A picture:
Checklines
Creating Checklines
Checklines allow you to stop players from taking shortcuts, and allow for proper lap counting. To make one, simply create a line segment with two points and position it on a part of the track. There are some guidelines for placement, however:
- They should only be used to stop major shortcuts, not karts cutting cutting off a corner.
- They should be quite wide, wide enough to be triggered even by karts driving off the track.
- Checklines should not be placed where they might be missed if the player or AI kart takes an alternate route. However, checkline groups (see below) can be used to mitigate this.
- You should have multiple checklines in a “chain” (see below) to make sure karts drive in the proper order.
- It is recommended to have at least 3 checklines per track in addition to the lapline
Activating Checklines
First, set each checkline as a checkline in the SuperTuxKart object properties. You will notice that you have two options to set: the “Name” field, and the “Activate” field.
The “Name” field is the group name of the checkline. If you have only one main route and no alternate routes, or if you have not placed checklines where they might be missed depending on the route taken, simply give each checkline a unique group name. The first checkline might have the name “Checkline1”, for instance.
If you wish to have checklines along alternate routes, create a checkline along the alternate route and on the main route between the two ends of the alternate route, and give them the same group name.
Now, for the “Activate” option for the first checkline, you would click the drop-down menu button, and choose the name of the second checkline or checkline group. Repeat this pattern for each checkline. For the last checkline, type “lap” into the “Activate” field. This allows for the lap to be counted.
But what, you ask, activates the first checkline? For the first checkline, select the main driveline, and, in the SuperTuxKart object properties panel, set “Activate” to the name of the first checkline.
Additional Lap Lines
If the beginning of the driveline cannot be made wider, and it is inconvenient to create a “gate”-style decoration to mark the start of the track, you can add additional lap lines. Simply create a line with two points, just like a checkline, give it the type “Lap line” in the SuperTuxKart Object Properties panel, and it will be activated by any checklines set to activate “lap”.
Be sure to set the “Activate” property of any additional lap lines to the next checkline!
Conclusion
Your track is now almost ready for the first stage of testing. Let’s review what you’ve done so far:
- You came up with an idea
- You created concept art and decided on the layout of your track
- You modeled your track in Blender
- You made it possible for AIs to drive on your track
- You added checklines for lap counting and to prevent cheating.
In the next module, you’ll export your track and give it a try in SuperTuxKart.